

Viewing the collected entries is an essential step, both for reviewing and analyzing the data and for making necessary edits, corrections, or updates. This fundamental process ensures the accuracy and integrity of the information you collect.
Whatever your need, from a review to detailed adjustments, this article guides you to access your responses efficiently.
Step by Step
For each response given in a form, you will have a collected entry. All collected and synchronized entries are saved in the session of each form, within the Coletum web.
To find your entries, follow these steps:
Access the main menu > Forms.
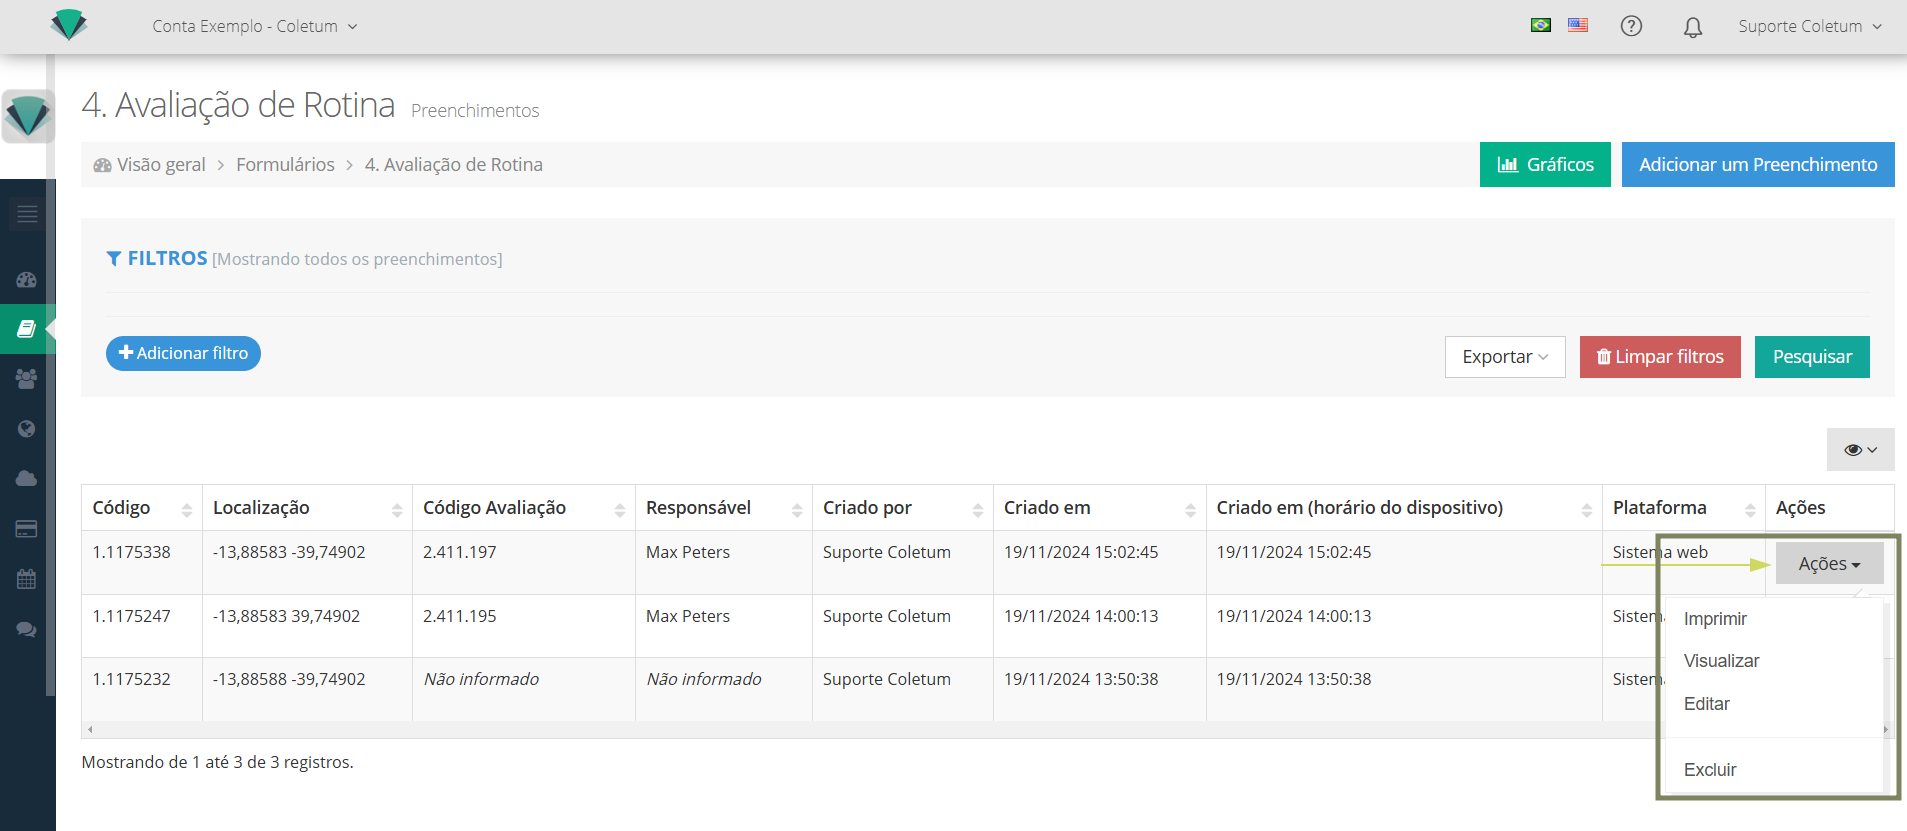
Identify the respective form and click on the Actions > View entries.
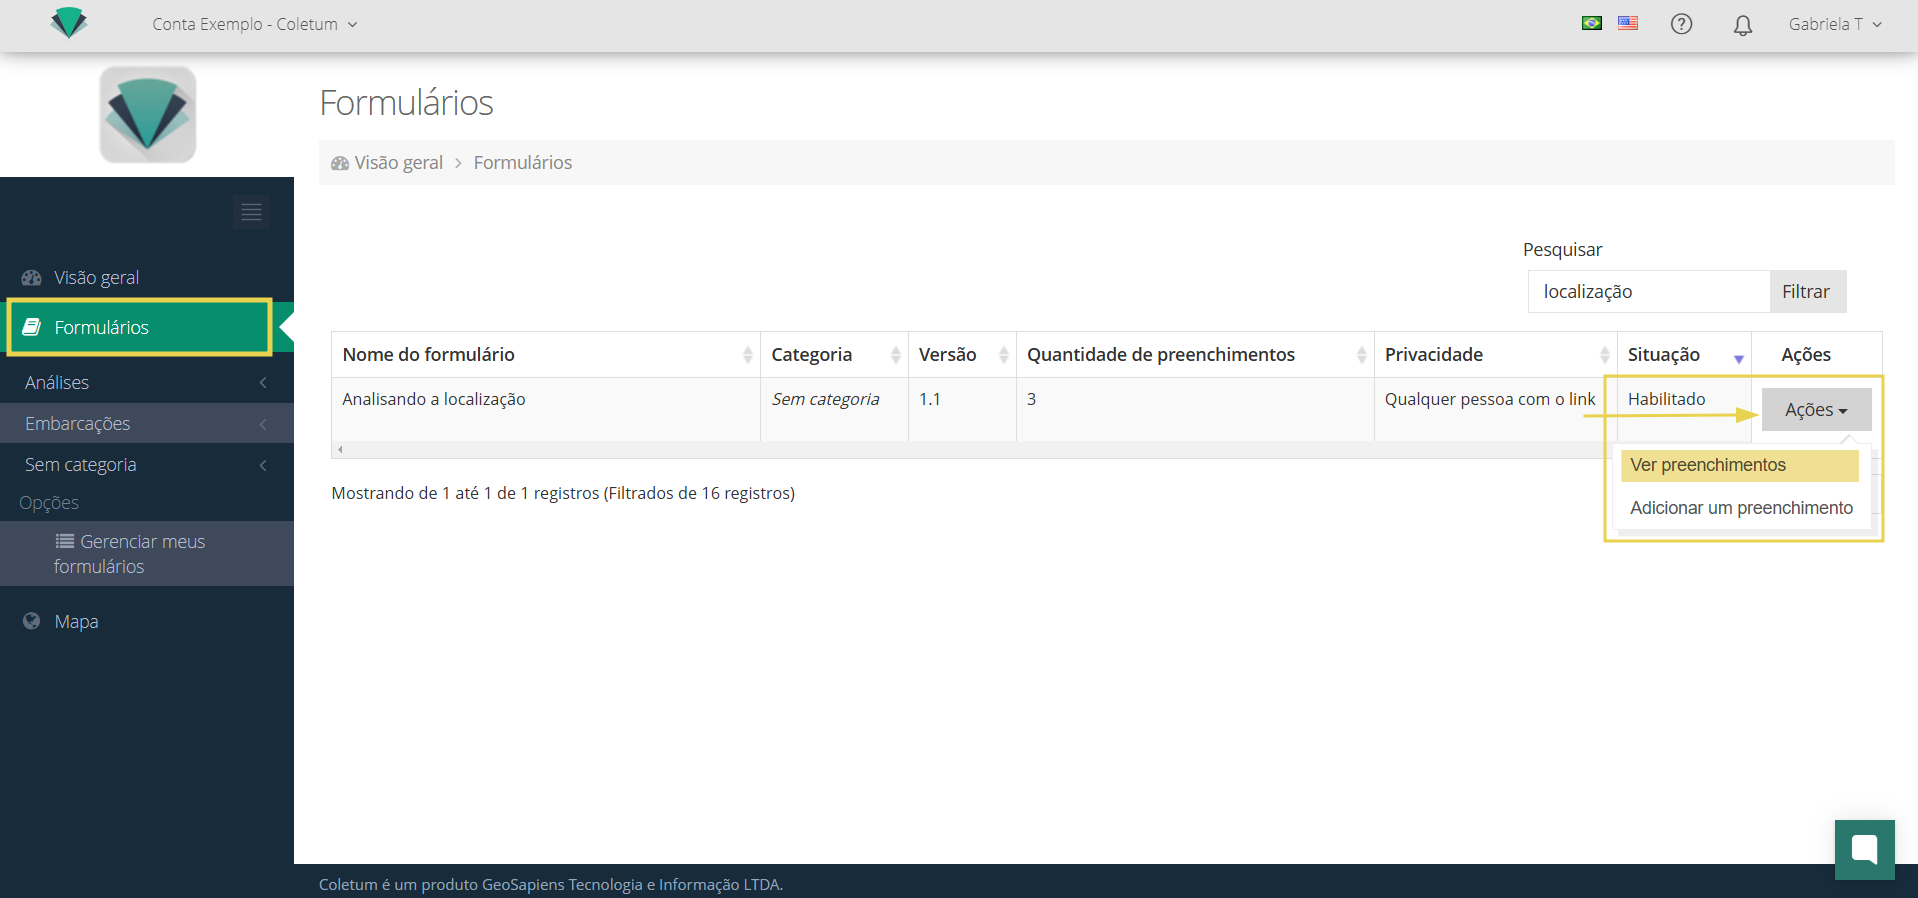
The next screen will display the list of all entries for the form.
Filters
To make it easier to find specific entries, you can use the filter function:
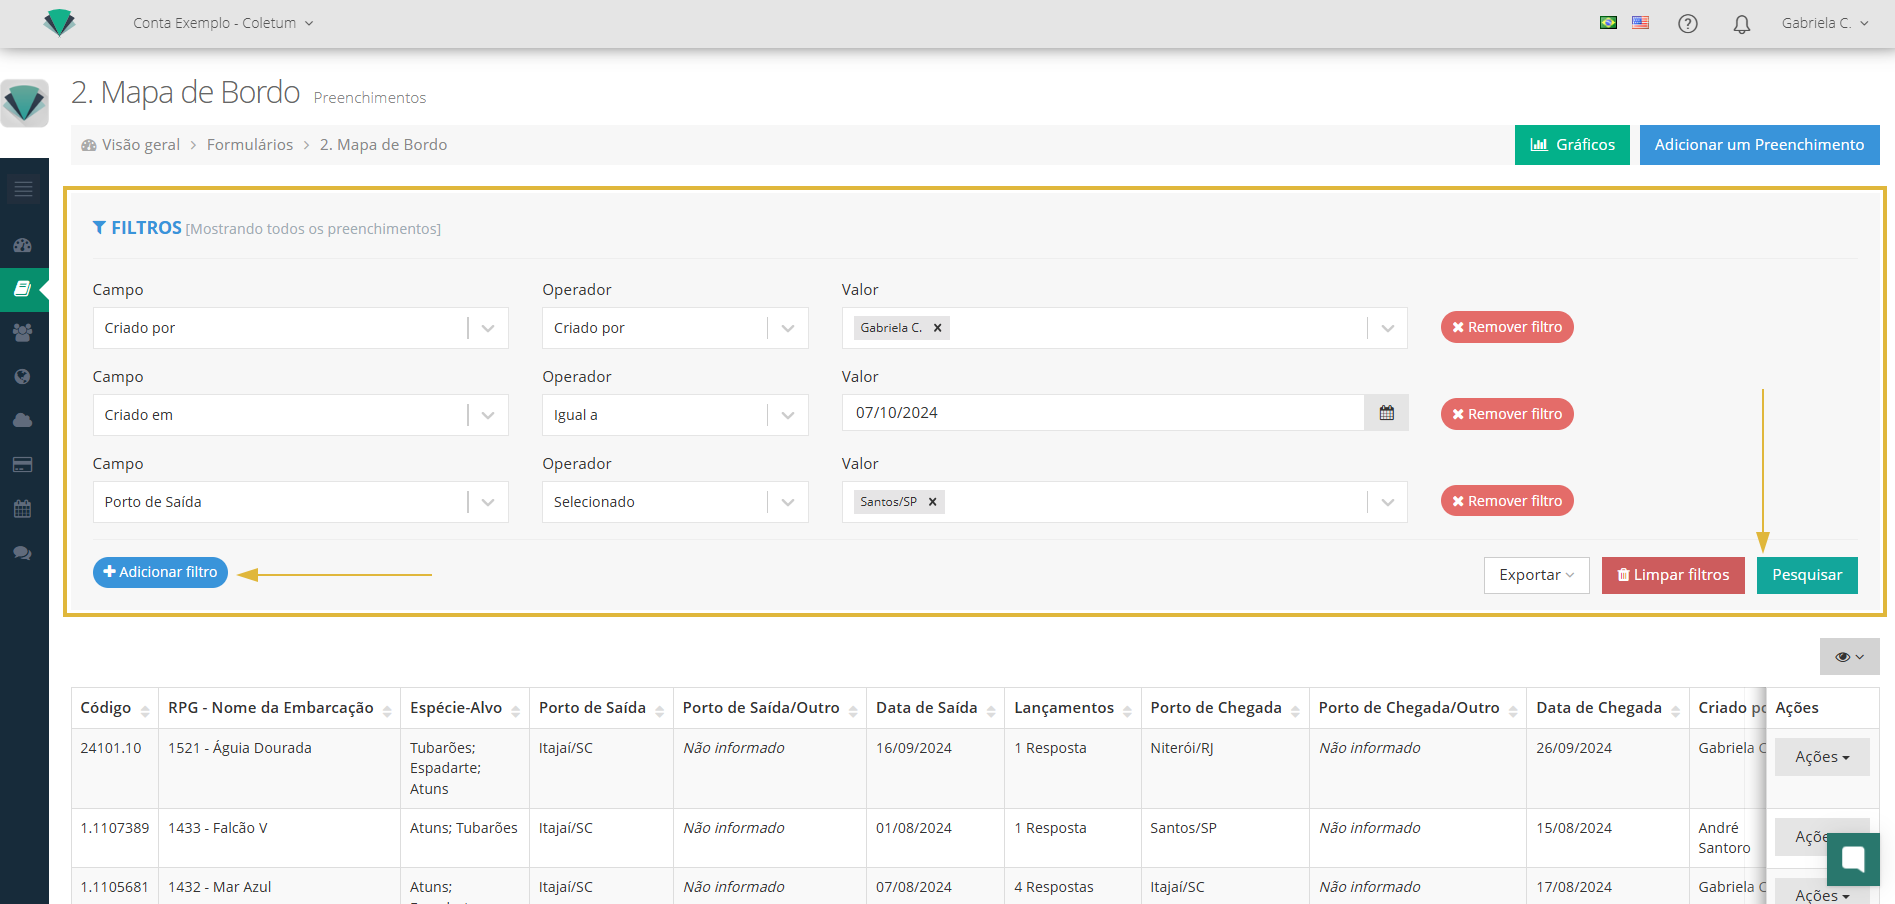
On the entries screen, use the option Filters > Add filter.
Select the desired criteria, such as date, created by and other specific fields.
Click on the option Search and see the result in the list below.
This function is especially useful when you have many entries and need to quickly find a particular one.
If you want to remove the applied filters, select the option Clear filters.
System log information
In addition to the data entered in the entries, Coletum also automatically generates some default data for each entry, which are essential for organizing and analyzing the data.
This data is displayed when viewing or exporting the entries, as in the examples below:
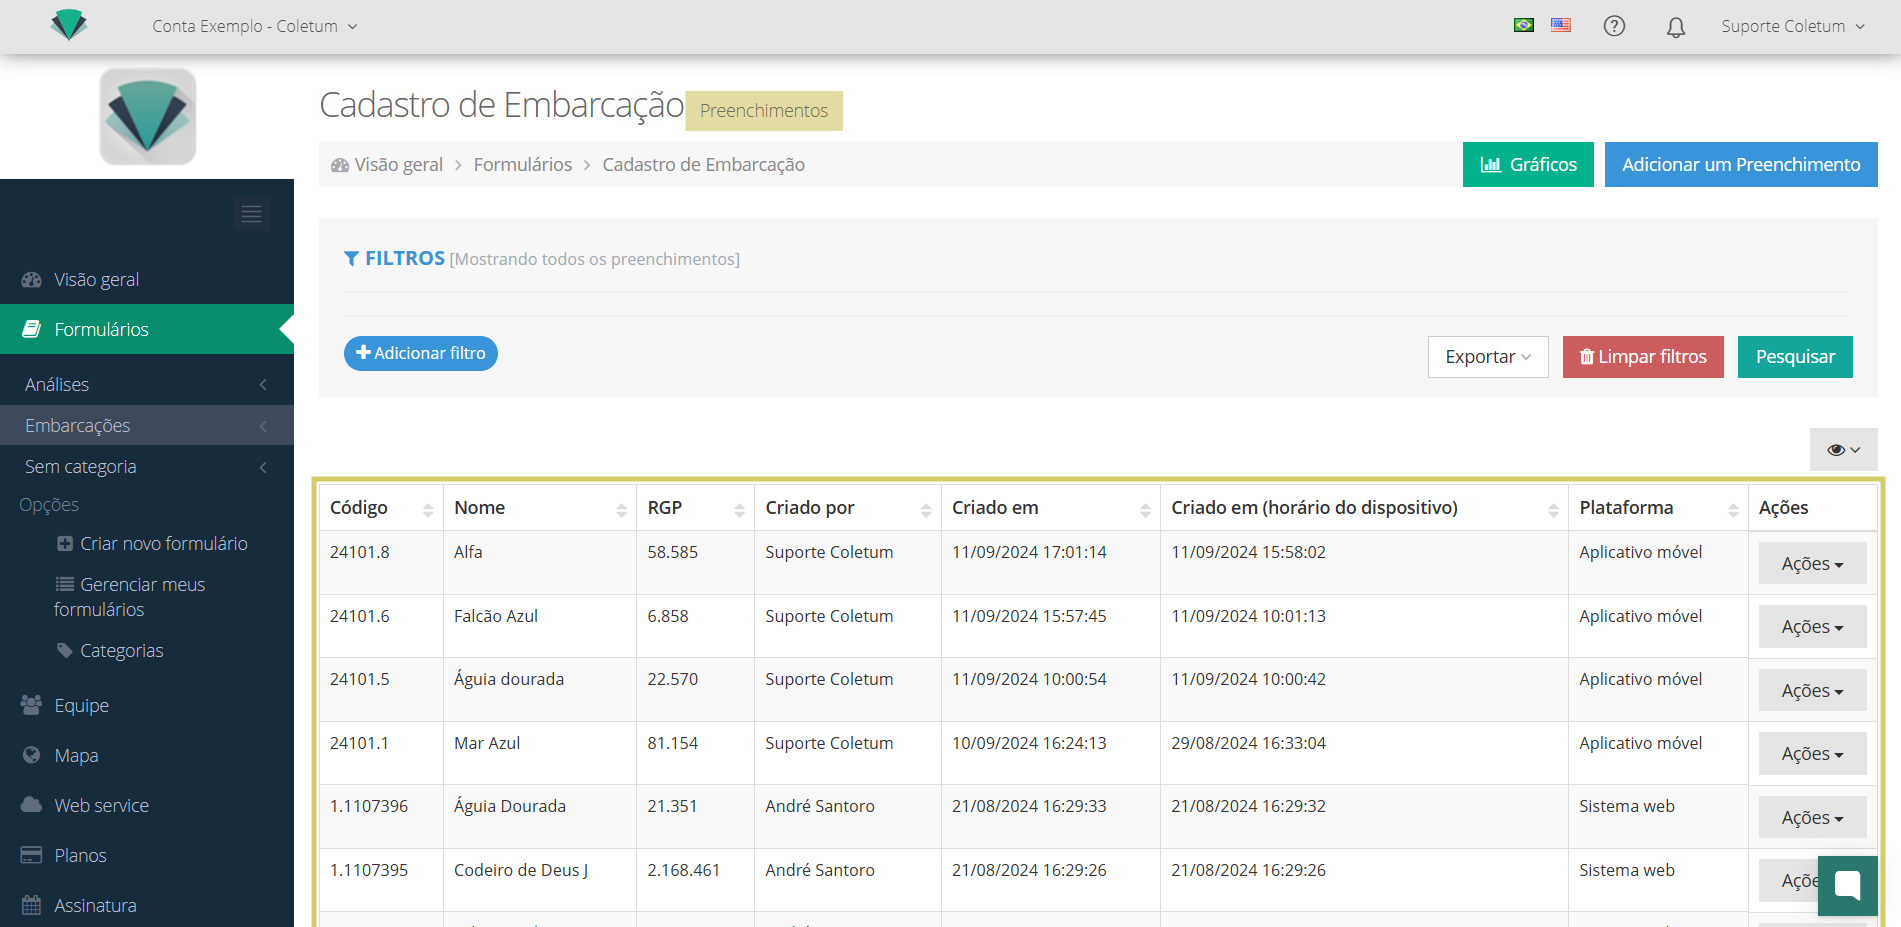
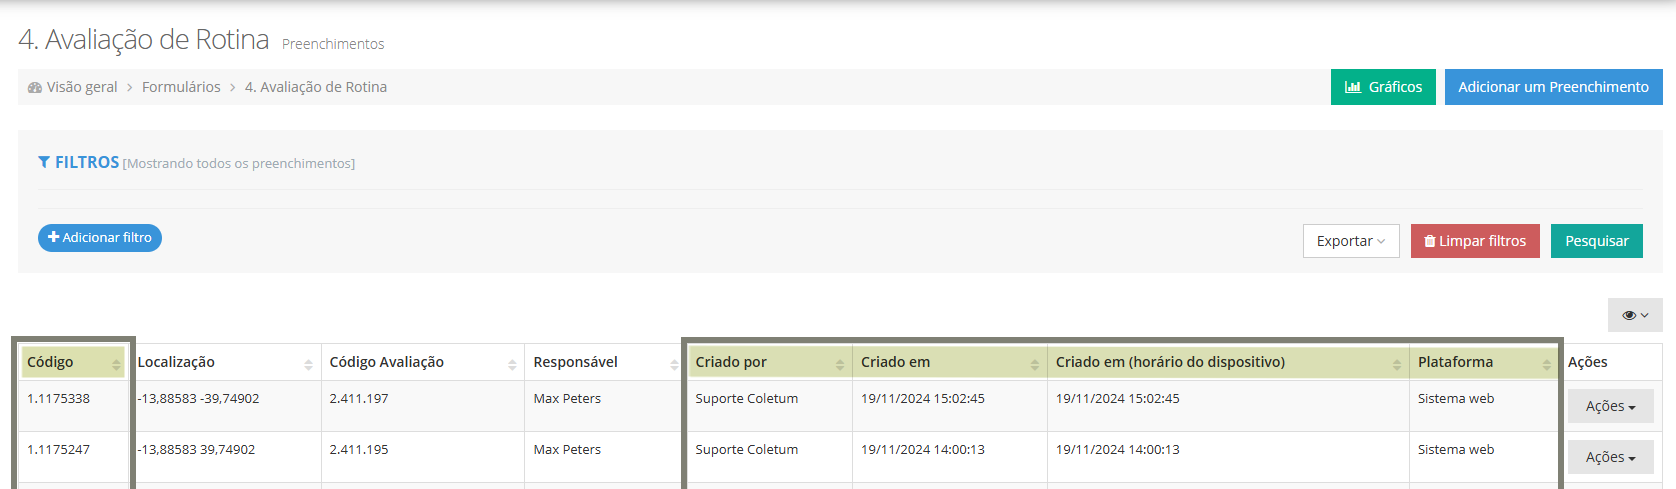
View in the entries section on Coletum web:
Visualization of the entry:
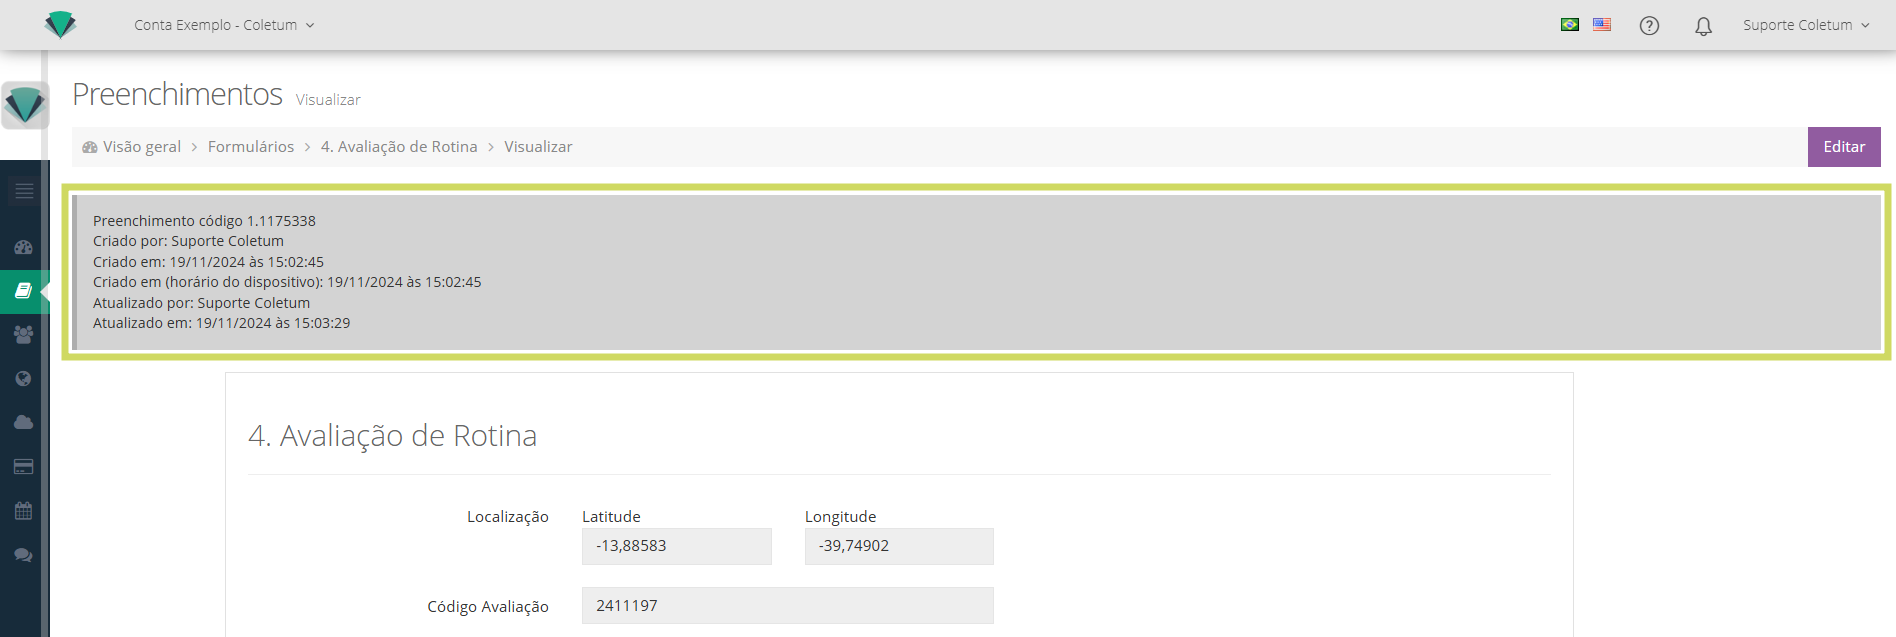
See below the meaning of each:
Entry Code: A unique identifier automatically generated for each entry.
"Created by": The user responsible for registering the entry.
Created on: The date the entry was synchronized and saved on the web platform.
Created on (device time): The date the entry was created on the mobile app.
Updated by / Updated on: When any edits are made
Platform: The origin of the entry, via mobile app or web platform.
This data helps ensure that you have a complete and accurate record of each entry, facilitating the management and analysis of the collected information.
Menu Actions
Each entry has the Actions menu. In it, you will find the following action options:
Menu Actions > Print: To save the entry as a PDF.
Menu Actions > View: To view a specific entry.
Menu Actions > Edit: To edit a response in the entry.
Menu Actions > Delete: To delete an entry permanently (for this, we recommend reading the article How to delete an entry?).
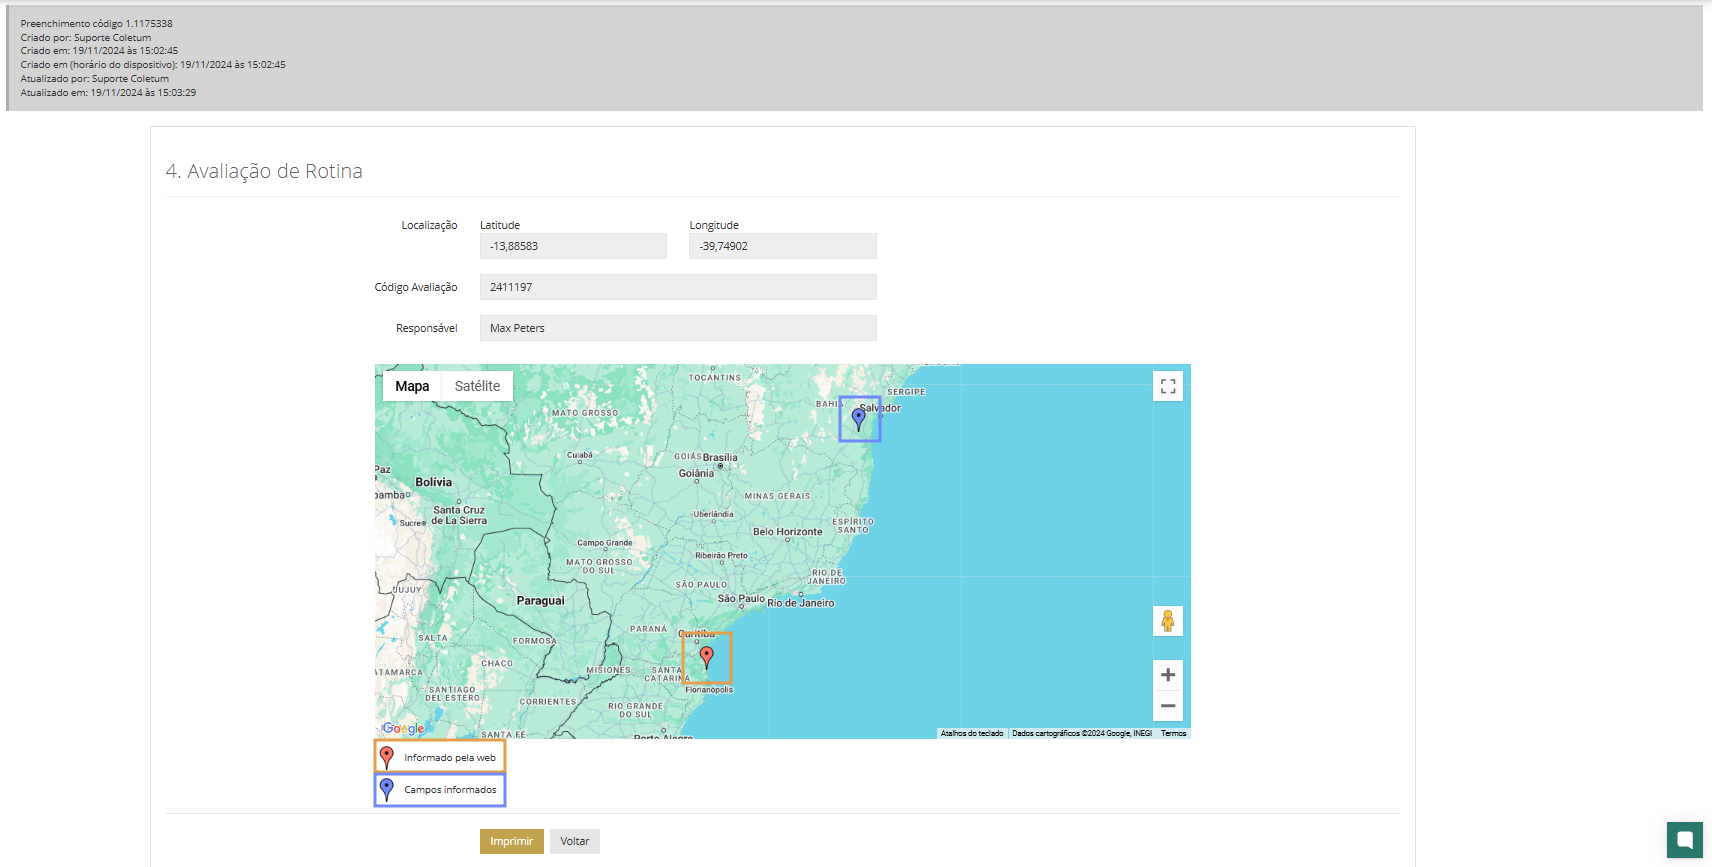
Viewing coordinates
The coordinate information is delivered in two ways:
Provided via the web: Original location of the user from where the coordinates were answered.
Fields provided: Coordinates answered in the form question.
Understanding "Not provided" responses
Have you ever wondered why some fields appear as "Not provided" when you are reviewing the responses to your forms? These are optional fields!
Let's better understand what this means.
Coletum web: viewing the "Not provided"

PDF Fillings: viewing the "Not informed"

Exports: the field is always displayed, but empty when there are no responses.

First, it’s important to know that "Not informed" is not a big deal. Actually, it’s just the system’s way of saying "Hey! This field is optional and was left blank." This happens for a few simple reasons:
Fields that appear and disappear: Sometimes, we create questions that only appear depending on other answers. For example, if you ask "Do you have pets?" and the person answers "No", that question about "What is your pet’s name?" will show as "Not informed". Makes sense, right?
Optional fields: You know those fields that aren’t mandatory? Well, if someone skips them, they’ll appear as "Not informed". It’s not an error, it’s just that the person chose not to answer.
Overview is important: When you look at the results, whether on the screen, in a PDF, or in a spreadsheet, all the questions appear. Even the ones left blank. This is great because it gives you a complete view of your form.
Mandatory fields are never left out: If a field is mandatory, rest assured it will always have an answer. The "Not informed" doesn’t appear in these cases.
Keeping everything organized: Showing all fields, even the empty ones, helps maintain the structure of your form intact. This way, it’s easier to analyze the data later.
Remember: seeing a "Not provided" does not mean something went wrong. It's just the system being honest and saying "Look, this question wasn't answered, but everything is fine!".
Valuable tip
You might come across a field marked as "Not provided" and think "Oops, I needed that answer!". If this happens, even if it's just once, it will be crucial for you to check the form settings. After all, we want to ensure you receive all the important information, right?
What to do:
Go to your form's editing mode (article How to edit a form)
Find the field that was left unanswered
Review and adjust the required and visibility settings as needed (article Global field settings)
Always remember to double-check your field settings. It's important that each question is adjusted exactly as you need it - whether mandatory, conditional, or optional.
By doing this, you ensure that you will receive all the important answers in future submissions. No surprises when analyzing your data.
Important points
Access to submissions varies according to the user's permission level
If you do not see the options described above, contact your account administrator to check your permission level for the form in question.
Submissions collected via the Coletum app are saved on the device until they are synchronized. Once synchronized, the collected submissions are transferred from the mobile app to the web. They are saved on the server and are available for analysis, editing, export, and any other action, directly through the Coletum web.
Related articles
Related keywords:
Do you have any other questions?
Check out other articles in the Help Center.
Contact our support team through the Support Channels.
We are here to help you make the most of Coletum!